3 Steps to Throw the Best 4th of July Barbecue

How to Throw a 4th of July Barbecue

The 4th of July is just around the corner! At the midpoint of summer, Independence Day is the perfect day for barbecues and outdoor parties. Why not invite your friends, family, and all the neighbors over for a big bash in the backyard to celebrate the season? 

You don’t have to have the biggest backyard or the fanciest setup to have a great time on July 4th. And we’ve got the scoop on all the best ways to make sure your bash is the one the neighborhood is talking about for years to come. Keep reading for our ultimate guide on throwing the best 4th of July barbecue in 3 easy steps. 

Step One – Prep the Yard

Before you can plan anything else for your 4th of July barbecue, you’ll need to make sure you have plenty of space for the party! Get the scene set up with the following items so your guests will have a place to mingle.

Patio Furniture

Your guests will need a place to sit! If you don’t already have a dining or conversation patio set, now would be a great time to make some updates. A couple of chairs, a coffee or dining table, and a patio umbrella are a great start to keep your outdoor area party-ready. 

Shade

Speaking of an umbrella, make sure your patio has adequate shade. If you’re barbecuing while the sun is still out in the evening, the heat can be brutal. Use umbrellas, a pergola, or other shade structures to keep you and your guests cool and protected from the sun.

Comfort 

Lay out some throw pillows and finish up your patio area with a cozy outdoor rug! It will add color and comfort to your party area so your guests can relax in style. And don’t forget the insect repellent! A citronella candle, bug spray, or repellent tiki torches will make your party area much more comfortable for everyone involved.

Pool

If you have a pool, make sure you prep it for your company. Check your water levels and add water if necessary to keep your pool in top shape. Check the chemical levels, as well, and adjust accordingly if readings are too low or too high. Too much chlorine or not enough will make an unpleasant swimming experience for your guests. If the water looks cloudy, you may want to shock your pool or treat it for algae as well.

Lights

Once it gets dark, fireworks and sparklers won’t be enough to light up your backyard for your guests. Keep the party going with colorful lanterns or outdoor lights to add a cozy glow to your backyard. Candles or torches can also add a cozy aesthetic to the night hours.
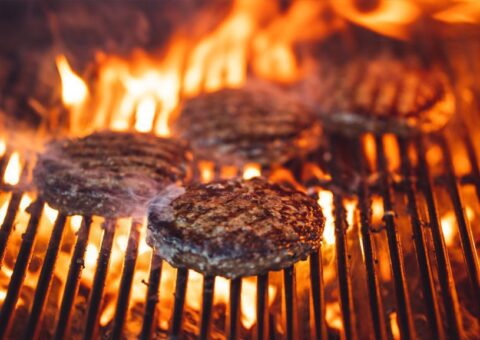
Grill

Your grill should be the centerpiece of your 4th of July barbecue! Make sure you’ve properly cleaned and prepped your grill– it’s going to get a lot of use feeding all of your hungry guests! Oil up the grates to keep food from sticking and make sure you have enough charcoal or propane to keep the fire burning until everyone is full! 

Step Two – Prepare the Menu

With your entertainment space prepped and the grill fired up, it’s time to make sure your guests are fed! Last year we rounded up all of our top favorite summer barbecue recipes, so check out that blog for a great place to start building your menu.

However, if you’re looking for a couple more themed dishes, take a look at our top 4th of July picks below!

Top Burger

If you want to get really creative, your guests will love this American Flag-themed burger! Use cucumber, ketchup, and mayo to create the stars and stripes of the American Flag on the patty for a social media-worthy dish! 

Top Hot Dog

They’re not traditional hot dogs by any  means, but these cute Firecracker Dogs are sure to be a hit with kids and adults alike! Topped with stars made of cheese and wrapped in a spiral bun, these dogs will shine like sparklers! (But they’re definitely way tastier.) 

Top Beverages

If you’re looking for a red, white, and boozy-themed cocktail, try this delicious layered cocktail that will wow your guests. It takes a little bit of finesse to pour to get the layers right, but with some practice you’ll be slinging patriotic drinks all night. 

If you’d rather have an alcohol-free option, this Berry Splash mocktail uses cherry drink mix, cranberry juice, and blueberries as a garnish for a delicious drink the whole family can enjoy. 

Top Side

Gelatin Salad may be considered more of a dessert than a side dish, but we couldn’t resist putting it on this list! Just look at how cute this red, white, and blue gelatin dish is! You’ll be the hit of the block party with this on your menu. 

Top Dessert

For a more classic dessert, try these Mini Pie Bites decorated to look like the flag! They’re fruity, delicious, filling, and best of all, simple to make! 

Step Three – Things to Do

And with the stage set, and the menu determined, it’s time to figure out the entertainment! Of course, if you have a local fireworks display, you’ll probably break to watch that at some point. But if you’re going to make the 4th of July barbecue an all-day affair, you’ll need plenty of activities to keep your guests entertained. Here’s our list of favorites that will be a hit with guests of all ages.

Cornhole/Hillbilly Golf

You can’t go wrong with a little bit of competition! Whether you have cornhole boards and beanbags, or some PVC frames and golf balls on string, the mechanics are the same: split into teams of two and see which team has the superior aim and skills! If you’re looking to DIY some games, here’s how you can make a cornhole set or a hillbilly golf course.

Sparklers

What would the 4th of July be without sparklers? Grab a package or two and light up the backyard with twinkling lights! For the littlest guests, red, white, and blue glow sticks can be a safer option to still participate in the fun.

Swimming

If your backyard is home to a pool, tell your guests to bring their suits and make a splash! Just be sure to have an adult supervising the pool at all times, and that everyone taking part is a strong swimmer, or has a regulation life vest available. Safety first! 

Water Balloons

For backyards without a pool, you can still have some splashing fun at your 4th of July barbecue! Fill up water balloons and have a full-out water balloon war!  Kids vs. adults, Family vs. Family, or everyone for themselves! Bring a dry change of clothes for later and let the water balloon war begin!

Have a Happy 4th of July Barbecue! 

Cincinnati Pool and Patio is your 4th of July barbecue expert! For grilling tips and accessories or pool maintenance, our service professionals are always ready to help. Visit our store for your last-minute 4th of July shopping, or get in touch with us today to schedule your pool service. 

The Ultimate Grill Maintenance Guide: 2 Processes for Gas and Charcoal Grill Maintenance

Grill Maintenance Guide

Warmer weather is just on the horizon. This means the return of barbecues and cookouts with your favorite backyard accessory—the grill! My mouth is watering right now, just thinking about it!

Chances are, you haven’t thought about grill maintenance since the end of last summer. It’s not fun to grill in the snow and ice in the dead of winter, after all. Has your grill been sitting untouched for months? You’ll need to give it a thorough once-over and a good cleaning before you invite the neighbors over for burgers. Throughout the season, it’s also a good idea to keep up with regular grill cleaning and maintenance. This way your grill will stay in top shape all year long.

Whether you have a gas grill or a charcoal grill, this is your complete guide to cleaning and maintaining your grill all year long. Read on for the differences between the two grills and our comprehensive list of cleaning practices.

Gas Grill Maintenance

Gas grills use propane or natural gas as a fuel source. They are more expensive than charcoal grills, but they are easier to clean, maintain, and are faster to cook with. But just because they’re easier to maintain than charcoal doesn’t mean they don’t require any maintenance!

Pre-Season Cleaning and Check

If your gas grill has been in storage for the winter, take it out and inspect it thoroughly. Remove any spiderwebs or other insects that might have made their home inside the lid or grates.

If you didn’t clean off your grill before storing it, give it a good scrub before firing it up for the first time. Use a new, wire grill brush to brush off any debris from the grates. If your grill is extremely dirty, you’ll want to give it a thorough cleaning. If your grill grates and barrier are made of aluminum, you can remove them to soak them in hot, soapy water to remove dirt and baked-on food. Make sure everything is fully dry and back in place before you fire it up.

For cast-iron grates, the cleaning method will be different. Cast iron can rust if the grates are not dried properly. Instead, heat up the grill for 15-20 minutes to burn off any residue that is stuck to the grates. If anything is left over, use your grill brush to scrub the remaining residue off.

Next, check the hose for leaks. Connect the propane tank, turn on the valve, and then spritz the hose with a mixture of water and dish soap. The hose could have a leak if bubbling occurs.

Regular Cleaning/Maintenance

Regular cleaning and maintenance throughout the season are the keys to keeping your gas grill in top shape. Each time you fire up your grill, follow these steps to get the best possible experience:

  • Pre-heat the grill for 10-15 minutes. This will loosen food debris that could be stuck to the grates.
  • Use your wire grill brush to brush debris off the grates.
  • Empty the drip tray.
  • Regularly check the inside of your lid for carbon buildup. Brush off any flakes that have accumulated.

End of Season Cleaning and Check

If you’re planning to put your gas grill away for the winter, your end-of-season maintenance will look very similar to your pre-season maintenance. Scrub any residue from the grates with your grill brush. Then you can thoroughly clean your grates with the method that best fits your grate material. Either remove aluminum grates and the drip tray to soak in warm, soapy water or pre-heat and scrub tough debris from cast-iron grates. Brush out the interior of the grill to remove any residue, as well.

Before packing your grill away for the winter, you should inspect the burners to make sure they aren’t clogged. With the grates removed, turn on your gas grill and watch the flames that come from the burners carefully. If the flames are uneven, your burners need to be cleaned. Turn off the grill and let it cool completely before removing the burners. You can then use a pipe cleaner or small, wire brush to clean the ports along the side of the burners. Gently tap them on the ground to remove debris from inside the burner.

You should also wash the exterior of your grill before putting it away for the winter. Once everything is thoroughly dry, reassemble your grill, disconnect the gas supply, and store the grill under a cover in a cool, dry place until the next grilling season. And don’t forget to store your propane tank separately in a safe, ventilated area!

Charcoal Grill Maintenance

Charcoal grills, just like the name sounds, use charcoal as a fuel source instead of a gas like propane. They tend to be less expensive than gas grills, and some grill enthusiasts will say the food will taste better when cooked with a charcoal grill. They do tend to take longer to heat up and temperature control is more finicky. However, if you have the patience, owning a charcoal grill can be rewarding. But you still have regular maintenance tasks to perform each season to keep your charcoal grill in top shape.

Pre-Season Cleaning and Check

Bring your charcoal grill out from storage at the beginning of the season and inspect it for debris. If your grill was put away dirty at the end of last season, this is where things will start to differ from the gas grill pre-season maintenance.

Build a fire in your grill and let it burn for about a half-hour. This will bake off any gunk stuck to the grates or inside of the grill. Use your wire grill brush and a scraper to remove any remaining debris off the grates. Turn off your grill and let it cool completely before giving it another, thorough brushing and scraping.

If your grill grates are made of aluminum, you may also want to soak them in warm, soapy water for a couple of hours. While the grates are soaking, wash the inside of the lid and bowl with soapy water and a sponge. Rinse everything thoroughly and reassemble your grill.

Finally, before firing up your grill to cook for the first time this season, you’ll want to grease the grates with vegetable or olive oil to prevent food from sticking to the grates. You could also use bacon fat or cooking spray. Just be sure to do this while the grill is cool so that the lubricant has time to dry.

Regular Cleaning/Maintenance

Keeping your charcoal grill clean throughout the season is the best way to maintain it. Follow these steps below each time you grill and periodically throughout the season for maximum effectiveness:

  • Empty the ash receptacle regularly to prevent accumulation in the air vents. Clogged air vents can make it more difficult to control the grill temperature.
  • Clean the inside of your lid every few weeks to prevent ash, smoke, grease, and other buildup from accumulating. Use a paper towel when the grill is cool to wipe off the excess buildup.
  • Clean the cooking grate after each use while the grill is still warm with your grill brush. It’s easier to remove food accumulation when the grates are still warm.
  • Oil the grates before putting your grill away after cooking. This will prevent food from sticking the next time you fire up your grill and prevents rust.

End of Season Cleaning and Check

Like with a gas grill, your end-of-season maintenance will look like your pre-season maintenance. Remove all the ashes from your charcoal grill and give it a thorough cleaning. Heat the grill to burn off the residue from cast-iron grates. Soak aluminum grates in warm, soapy water. Then wash the bottom of the bowl and the grill lid.

When everything is dry, replace the grates.  Make sure the grates are well-oiled, then cover your grill with a weatherproof cover and store it in a cool, dry place. When you bring it out at the start of next season, your pre-season maintenance will already be half-done!

Fire It Up, Grill Master!

Whether you’re cooking with a gas grill or a charcoal grill, keeping up with maintenance throughout the season is the key to delicious cookouts every time. Are you looking to add a new grill to your patio this year? Or do you need help with supplies and maintenance? The grilling experts of Cincinnati Pool and Patio are always here to help. Check out our grill selection online or contact us with questions!

30 Delicious Recipes for Your Next Summer Barbecue

Burgers on a Grill Summer Barbecue

There’s nothing quite like a summer barbecue. The bright summer sun, good friends, and a whole lot of delicious food all make your summer barbecue something special. With Labor Day just around the corner, it might be time to start planning your end-of-summer party. You may already have a guest list and some fun backyard activities in mind, but what about the menu? That’s where we come in. We’ve scoured the internet for the best summer recipes, from grilled goodies to succulent sides, to delectable desserts. Oh, and you can’t forget the drinks! 

Read on for our top picks for each category and start planning the menu for your next barbecue!

On the Grill

Burgers

King Burger – This recipe calls for marinated beef patties to be formed around butter for an extra-juicy flavor. Grill the patties for 5-7 minutes and toast the buns, then serve with sauce, shredded lettuce, and your other favorite fixings for a burger fit for a King!

Bacon Cheeseburger with Sweet Potato Chips – Your side is included in this twist on the classic bacon cheeseburger! Fried sweet potato slices make a crunchy substitute for fries, and you can even sub your favorite cheese instead of American if you really want to spice things up. And don’t forget the bacon!

Mexican Turkey Burgers with Cilantro Lime Pesto – Who said turkey burgers have to be boring? This south-of-the-border-inspired burger calls for seasoning the patties with cumin, paprika, jalapeno, chili powder, garlic powder, and onion, just to name a few things. Pair it with the homemade cilantro lime pesto and you’ve got a zesty burger that’s sure to please. ¡Olé! 

Black Bean Burger – For vegans and veggie-lovers, try this delectable black bean burger. Black beans, brown rice, and tortilla chips combine into surprisingly delicious patties that when spiced with cumin, will convert any meat-lover over to the veggie side. 

Hot Dogs

Grilled Hot Dogs with Hatch Pineapple Salsa – For a tropical twist on a classic, try this Hatch Pineapple Salsa recipe drizzled over perfectly grilled hot dogs. The chiles and pineapple blend with pepper jack cheese for an island taste that you just can’t beat!

Chicago-Style Hot Dogs – Get a taste of the Windy City in your own backyard! This recipe calls for homemade poppy-seed buns and sport peppers for a truly authentic Chicago dog taste. 

Other Meats

Soy-Basted Chicken Kebabs with Sesame-Citrus Sprinkle – Kebabs are a great barbecue option, and this twist on chicken is sure to please even the toughest crowd. Soy, sesame seeds, and lemon zest combine for this Asian-inspired twist on grilled chicken. 

Thai Curry Grilled Chicken – This one requires a little prep to marinate the chicken overnight, but the combination of lime juice and coconut makes the chicken so creamy and tender and perfect for summer!  

Creamy Herb-Grilled Salmon – Sour cream, ranch dressing, and a bunch of herbs pack a flavorful wallop with this tasty twist on grilled salmon. Not too heavy and light and creamy, the fish with this sauce screams easy summertime living. 

Grilled Shrimp Tacos – Who doesn’t love tacos? Olive oil, lime juice, chili powder, and cilantro blend together to give your perfectly grilled shrimp a little summery kick that’s sure to be a crowd-pleaser. Garnish however you like but we recommend avocado, cheese, and hot sauce for an extra punch!

Veggies

Corn on the Cob with Seasoned Salts – A little salt, pepper, paprika, and olive oil turn bland, boring corn on the cob into a flavorful favorite that you’ll want to add to your list of summer staples.

Grilled Mixed Mushrooms with Sesame Dressing – Mushrooms can be prone to drying out when you grill them, so seasoning them with a liquid, such as in this case, a mixture of soy sauce and butter, helps keep them moist and flavorful. Each different mushroom type will have a different cooking time, so pay attention to how long each one needs to grill for the perfect mushroom each time.

Balsamic Vegetable Skewers – Balsamic vinaigrette adds a tangy taste to basic grilled vegetables. The key to this recipe is choosing vegetables that stay firm on the skewer while grilling so they don’t lose their texture and flavor. Zucchini, squash, red onion, bell peppers, and grape tomatoes are the perfect combination.

Grilled Corn, Tomato, Feta, and Herb Salad – In case you’re not a fan of corn on the cob, try charring it and then removing it from the cob to combine with tomato, feta cheese, parsley, basil, and mint for a delicious, crisp salad.

Scrumptious Sides

Smokin’ Potato Salad – Potato salad is a classic barbecue side dish, but this twist calls for smoking the potatoes on the grill first before chopping them and adding the other ingredients. 

Garden Pasta Salad – Pasta salad is also one of those classic sides for family cookouts. Tri-color pasta and several varieties of bell peppers make this a colorful, flavorful addition to any barbecue buffet table. It’s also super quick to make!

Baked Beans with Brown Sugar & Bacon – Skip the canned baked beans! This recipe is super easy to make and leaves you with the perfect savory, sweet AND smoky baked beans that will have you coming back for seconds. 

Cucumber Tomato Salad – For a refreshing summer side, mix cucumber and tomato with basil, balsamic vinegar, and olive oil, and voilà! You’ve got a simple, fresh salad ready for serving. 

Zucchini Fritters – A perfect way to sneak vegetables to even the pickiest of kids; slice up a zucchini, mix it with flour, parmesan, egg, and garlic and fry them in a skillet for a crunchy, healthy side dish.

Sweet Potato Fries – It’s hard to have a burger without fries, but sweet potato fries are a great way to switch things up. Slice up some sweet potatoes and season them with cinnamon or red pepper depending if you want sweet or spicy, then simply place them in the oven to bake! 

Delectable Desserts

4-Ingredient Blueberry Yogurt Popsicles – Sweet, tart, and a little creamy, these simple popsicles scream summer and will make all your guests scream for more! And at just four ingredients, blueberries, yogurt, honey, and milk, it doesn’t get any easier to have a frozen tasty treat.

5-Minute Jello Salad – No barbecue is complete without a jello salad for dessert. Try this super-simple recipe with strawberry or raspberry jello, cottage cheese, and cool whip for a fluffy, delectable dessert.

Fluffy Key Lime Pie – On the theme of jello, try lime gelatin in this easy, no-bake pie that is sure to cool you down in the heat of the summer. 

Frozen Greek Vanilla Yogurt – Looks like ice cream, but it’s much healthier for you! Simply mix low-fat greek yogurt, vanilla extract, gelatin, and sugar and let it freeze into the perfect consistency. 

Peanut Butter Chocolate Dessert – For both lovers of chocolate and peanut butter, this combination dessert “lasagna” is sure to be a hit! 

At the Bar

Watermelon Mojito – Mojitos are a classic summer cocktail, and the watermelon twist is sure to cool you off on even the hottest of days. 

Mai Tai – Can’t have a taste of the beach in the backyard without a classic Mai Tai. Float dark rum on top of pineapple juice, light rum, and triple sec for a sunset-inspired cocktail.  

Frozen Pina Colada – Another drink so classic there’s even a song about it, the Pina Colada will have you humming your favorite song and sipping your favorite pineapple-coconut concoction all evening long. Plus this recipe even has a virgin variety, so everyone on your guest list can feel sophisticated. 

Lava Flow – Creamy and Hawaiian-inspired, you’ll love this pineapple, banana, strawberry, coconut, and rum blend. It’s the perfect way to bring the beach to your own backyard.  

Pineapple Mimosa – Pineapple vodka, sparkling wine, orange juice, and lemon juice make this summer bar staple a refreshing anytime drink. 

Bon Appétit! 

Is anyone hungry yet? I know I am! Pick your favorite dishes and call your closest friends and you’ll have a Labor Day barbecue to remember until next summer. And if you need help firing up the grill (or choosing a new grill), stop by Cincinnati Pool and Patio for all the things you need to make your backyard barbecue a hit. 

Tips For Grilling In Winter

grilling in winter

Tips For Grilling In Winter

When the temperatures start to drop, our first reaction is to escape to our homes and avoid braving the cold as much as possible. We’re here to tell you that you don’t have to become a recluse this winter! You can enjoy a delicious grilled meal just like summertime! Yes, you can enjoy grilling in winter.

Keep it Covered

Getting a cover for your grill before winter is important because it not only will protect your grill from the elements, but a cover makes grilling more convenient during the months of heavy snowfall. Simply dust the snow off the cover with a shovel or brush, then remove the cover, and you have yourself a snow-free grill. We always recommend keeping a shovel or brush right outside your back door to clear a path to your grill as well.

Fuel Check

Make sure to keep extra fuel nearby during cold months. Charcoal should be stored in a dry place protected from snow or rain. When you are grilling with charcoal be sure to use a little extra because it will burn quicker in colder and windy weather. For all gas grilling, remember to preheat with all burners on high for at least 15 minutes. Having a full gas tank and extra charcoal ensures you will be able to keep your grill at the desired temperature.

The colder temperatures will mean your grill will need a little more time to get up to the temp you want for cooking. Give it a good 5-10 minutes extra from what you would normally wait. It is best to pre-heat to 400 or 450 degrees as a minimum and then adjust the temperature. When you place your food on the grill and it doesn’t sizzle then that tells you that it is not nearly hot enough. If cooking on a charcoal grill, make sure to use plenty of charcoal to get the heat needed for grilling.

Stay Warm and Safe

The Midwest hit some low record-breaking temperatures last year, so just remember if you are going out in the cold to grill, bundle up in your winter gear, tuck in any scarfs inside your coat, and use your grilling gloves when handling the grill!

Safety First

Just because it’s cold outside remember it is never a good idea to grill in an enclosed space that can trap deadly carbon monoxide, like inside a garage, under an overhang, indoors or in an enclosed area. In addition to carbon monoxide accumulation, accidental fire damage, and smoke damage are all possible to be aware of any loose or dangling clothing that could catch on fire.

Being well-prepared is the best way to avoid problems. Place your grill on a firm level surface—a wooden deck is not the best choice for obvious reasons! Keep your spare fuel away from the lit grill.

Winter clothing like scarves can trail into the flames, so be sure you’re safely dressed when grilling.


Good Lighting

If you’re grilling in winter after dark, you’ll need to choose outdoor lighting, both for atmosphere and practicality. Light strings are an attractive feature when draped around your deck. Don’t rely on extension cords as your power source because they are a trip hazard. And beware of naked flames like candles if children and pets are around.

For grilling, a good overhead light is best, but you can get excellent visibility with a powerful headlamp that leaves your hands free for cooking.


Invest in Grilling Gloves


Normal winter gloves might keep out the cold, but they won’t cut it for grilling. Purposely designed grilling gloves are made to withstand extremely high temperatures and have long cuffs to protect your hands and wrists against burns. Made from fire-resistant material such as silicone, they won’t wear into holes, and they often have special non-slip grip for safety when handling hot food and utensils. And best of all, they’re easy to clean—some are even dishwasher-safe.


Avoid Catastrophes

Planning is key: Locate your grill at least 10 feet away from fences, buildings or other flammable materials. Have a designated place for raw and cooked food and don’t mix the two—no one wants food poisoning to follow a great barbecue! Use separate utensils, too.


Build a Permanent Grill Shelter

For confirmed winter grilling fanatics, the best solution is to construct a purpose-built shelter that houses your grill, and also has a wide range of customizable features like built-in cooler space, storage for barware and beverages, lighting and bench seating.

Have any questions about grills, grilling in winter,  or any other products that we offer? Contact us here. 

Cleaning Your Grill

Grill Cleaning

Cleaning Your Grill

Like any good relationship, you need to put some work into the one you have with your grill. It doesn’t matter if you’re dealing with a top-of-line model or a cheap knock-off, with proper maintenance, cleaning your grill bound to keep it working a long time.

Polish the Outside

If you have an enamel grill, you can just spray a paper towel with glass cleaner and wipe down the exterior. For a stainless steel grill, you should use a brush and polish made for steel. Then you can buff along the grain with a microfiber cloth.

CLEANING THE GRILL GRATE

After getting a fire going, the first order of business is cleaning the grill grate. The grill grate will see the most action and because of this—and the fact that food will come into direct contact with it—most of your cleaning attention should be focused here.

If you haven’t already, invest in a good grill brush with a long handle and firm bristles or scouring pad.

Soak and Scrub

Remove the grates and the metal plates underneath, and place everything in a bucket of hot, soapy water. After a few minutes in the bucket, give the grates and the plates a good scrubbing with the grill brush; dip and redip it in the soapy water as needed. Give the grates a rinse with the garden hose and set aside. Use the grill brush to scrub the inside of the hood with hot, soapy water (that stuff that looks like peeling paint is a harmless buildup of carbon), and use steel wool for hard-to-get nooks.

Remove and clean the drip pan, then toss it into the soaking bucket. Let sit, then scrub with the grill brush and rinse with the hose. Reassemble the grill (no need to dry anything), and reconnect the propane tank. If there’s a cabinet below, give it a good sweeping with a whisk broom, then wipe it out with a damp paper towel.

OILING THE GRATE

After cleaning the grate, the question is: “To oil, or not to oil.”

Oiling your grill grate helps prevent food from sticking when cooking. To do this, dip a wadded paper towel in a little oil and, using tongs, wipe the oil evenly over the grate. Be careful not to use too much oil, because that’s a sure-fire way to start a good flare-up—a little goes a long way here.

CLEANING YOUR GRILL

Cleaning the grill grate and the ash out is very important, the rest of the grill—not so much. About once a month take a rag and some cleaner to the outside of the grill to keep it looking nice and shiny. Like a good cast iron pan, grilling over and over seasons the inside of your grill.

Fire up the grill, cranking it high for 15 minutes to burn off any food residue. Use a stainless-steel grill brush to scrape anything loose off the grates. Then turn all the knobs off, disconnect the propane tank (or, if your grill is connected to your main gas line, turn off the gas line), and wait until the grill is cool to the touch.

Clean the burner

Make sure the propane tank is turned off. Remove the briquettes and cooking grates, and carefully detach the gas tubes and burner. Clean the tubes with warm, soapy water and dry them with a towel. Wipe the burner clean with a damp cloth.

If you have a gas grill, one part that often gets clogged is its burner tubes. Symptoms of dirty burners include reduced flame size. They may also burn with an orange color instead of the usual blue. Both indicate abnormally low temperatures and an underpowered grill.

Typically a gas grill has multiple burner tubes, though some may only have one. Use a nylon or steel wire brush to gently clean the small holes on the tubes. Be sure to brush from the center of the tube outward, moving sideways (not up and down). Otherwise, you may push debris into the tube or holes themselves instead of clearing them.

Burn Off The Grease

During grilling season, briquettes transfer heat to the cooking grates, leaving them coated with grease. Before firing up your grill, flip over the briquettes, close the lid, and heat the grill on high for 15 minutes.

Certain practices can help discourage deposits of dirt and grease from forming in the first place. One method is to grease the grates of your hot grill with a little cooking oil right before you start cooking. In the same vein, scrubbing grates with raw onion is another tactic you can try. If you do have a grill brush without bristles, it’s a good idea to scrape your hot grates both before and after grilling.

Wrap It Up

If you don’t have a grill cover or never use the one you do have, change your ways. It could reduce your monthly deep-cleans to once a season. Best are vented covers, which allow moisture to escape.

If you have any questions about grills or cleaning your grill then you should contact us here!

Summer Grilling Tips

grilling tips

One of our favorite things about summertime is summer barbecues and cookouts. We know not everyone is a grill master. That’s why we’ve assembled a list of our best grilling tips to ensure you can have fun and be safe during your summer cookouts.

Here are 14 of our grilling tips!

The Pool and Spa Warehouse’s Grilling Tips

Clean Your Grill

Start with a clean grill. Don’t let last night’s salmon skin impart a fishy-char flavor to tonight’s chicken breasts. Use a sturdy metal brush to clean the grates in between uses.

The Less Movement The Better

Don’t move the food around. In general, the fewer times you flip something, the better (once is ideal for most meats). If the meat is stuck to the grill, let it cook more — it will unstick itself when it’s ready for flipping.

Don’t Press Down

Don’t squeeze or flatten meats. Yes, I know that burst of sizzling flame that comes from squishing a burger with a spatula is tempting. But you know what is creating that flame burst? Fat. And you know what fat is? Juicy flavor. Don’t squish meat, because you will squeeze out the taste and moisture.

Keep Water Near

Keep a spray bottle handy for flare-ups. Flames are not your food’s friends — they will char it unpleasantly. Keep a spray bottle filled with water handy; this will allow you to dampen flare-ups without interfering with heat.

Check The Temp with a Thermometer

Buy a meat thermometer. Unless you are a very experienced cook, it is hard to tell meat’s temperature merely by touching it. (Although if you are interested, here’s how to do it: Touch the meat. If it’s soft like the flesh between your index finger and thumb, it’s rare. If it’s soft like your cheek, it’s medium-rare, and if it’s firm like your forehead it’s well-done.) More accurate for most of us: A quick check of temp from a thermometer. Your confidence in grilling will skyrocket with this one $10 purchase.

Use aluminum foil to trap heat.

Really hot grill bars equal great grill marks on your steaks. To concentrate the heat and keep it from escaping, lay a sheet of foil over the grill for 10 minutes. Peel the foil off just before cooking, scrunch it into a ball (it cools fast) and use it later to scrape any residue or ash from the bars.

Bring the Meat to Room Temperature

Avoid putting cold foods straight on the grill. Letting meat come to temperature on the counter for 30 minutes before grilling will help it cook more evenly. (If you are looking for a rare sear, however — like if you’re grilling tuna, for example — then chilled is the way to go!)

Season meat liberally.

One of the most important grilling tips. Big, thick steaks need a lot of seasoning, so be sure to cover them liberally with salt, pepper, and any rub before grilling. A good rule of thumb for home cooks is to salt the meat twice as much as you think is needed.

Under not over

Undercook foods, just slightly. Carryover cooking is a real thing — food continues to cook after it leaves the grill. You can expect food temperature to go up about five degrees after leaving the grill, so plan accordingly.

Don’t poke.

When checking for doneness, resist the urge to repeatedly poke, stab, or pierce your meat with a fork or prongs. The juices will escape, making the meat drier and less flavorful. Use a spatula or tongs to gently move and flip your food

Create heat zones.

On a kettle grill, bank up the coals in the center. Sear food in the middle, where heat is highest, then moves it to the outer edges of the grill to perfectly cook without burning. On a gas grill, leave one burner on high, another on medium.

Cook on the coals.

Lay sweet potatoes, onions, and even corn in the husk directly on the embers. Roast, turning with tongs until the skins are coal black. When you scrape off the burned skin, the vegetable inside will be super sweet and smoky.

Let It Rest

Rest all meat! Allow the meat to sit undisturbed (and unsliced!) for five to 15 minutes after cooking, as this will allow the juices to redistribute. The bigger the piece of meat, the longer the rest time. Resting meat is an important key to juicy results.

Don’t Over Char

Don’t over-char to cook through meat with bones. No one wants to eat meat covered in thick, black char. If you have thicker meats with bones, such as chicken thighs or legs, cook them on high heat to get a nice crust, and then move to lower, indirect heat on the grill. This will allow the meat to cook through more slowly without overcooking the outside. Or, consider par-cooking the chicken in an oven for 15 to 20 minutes before grilling. Also great to precook: ribs!

Have any questions about grills? Or need more grilling tips? Don’t hesitate to contact us here!

The Benefits of Outdoor Kitchens

outdoor kitchens

The Benefits of Outdoor Kitchens

Have you considered getting an outdoor kitchen for your home? Outdoor kitchens can be a great addition to the right home.

We’re going to discuss all of the benefits that come with installing a kitchen in your backyard or patio arrangement.

Increased Home Value

Outdoor kitchens are generally thought to be a luxury item, that can make your house more marketable. Outdoor kitchens have a higher rate of return on your investment, like constructing a garage door in comparison. In case you don’t have a huge yard, make sure you take into account the dimensions of your kitchen. Prospective homebuyers enjoy having an open area which isn’t consumed by structures, like pools and kitchens.

More Living Room

If you don’t have a large gathering space inside your home, an outdoor kitchen is a great option for you. If you’re hosting a party, guests will be able to have more space to relax on the patio and lounge around the outdoor kitchen

Whenever your outdoor patios are coupled with an outside kitchen, food prep becomes sort of a group activity. Therefore, no one gets stuck inside cooking while everyone else is drinking on the patio.

Maintain The Smell of Cooking Outdoor

Another benefit of having an outdoor kitchen is you can keep the smells of grilling or charring foods outside. You won’t have to deal with the smokiness or worry about your house smelling like whatever you’re cooking in the summertime.

An outside kitchen retains cooking grease, odors, smoke, and heat outside–a big plus in sweltering summertime.

Save on Utilities

Cooking outside can also help you save money and energy on your bills. When you cook outside, your A.C. won’t have to work overtime to deal with the heat in your kitchen.

Design Factors of Outdoor Kitchens

When designing your outdoor kitchen, you’ll want to put a lot of time and thought into what exactly you want and need.

A great first place to start is thinking about the ventilation. You’ll want to create a way for smoke to rise and dissipate from the area.

Another priority you should think about first is the size of your patio and the measurements of the accessories. You’ll want to make sure you have enough space for the items, and for anyone on the patio to fully relax.

When planning your layout are some developments to consider:

All About The Grill:

First, you’ll have to think about the size of the grill you want. This solely depends on how many people you want to cook for, what you’re going to cook, and how often you’re going to use the grill. If you plan on hosting large parties and cooking for every guest, a bigger grill is more your style. Though if you just want to cook for your family, and medium to a smaller size will be fine.

You can also decide if you would like your grill to be connected to the ground, or if you would like to be able to freely move it around. This will also be dependent on the size of the grill you need.

Countertops:

When thinking about countertops, you need to think: “How much prep space do I need?”  If you plan on preparing a lot of recipes outside, you’ll want a lot of space. If you’re unsure, get a countertop that’s easy to change out or add to.

Constructed Cabinets:

Cabinets are a great convenience to have outside. With this addition, you won’t have to run in and out from your house to retrieve extra silverware or plating. You can also invest in cabinets that you can lock if you’re worried about theft.

Lighting:

Lighting is what separates the good, bad, and ugly outdoor kitchens. Proper lighting will ensure that you can use your outdoor kitchen at any time you want. Floor lighting, fairy lights, LED, and lamps are all great options.

Lighting can add ambiance and will ensure your guests will be able to see all the delicious food you cook them.

Sink:

Having an outdoor sink can be convenient for you and your guests. You can wash and rinse any outdoor plates right outside, or allow your guest easy access to water refills.

The only limitation you have to a sink is making sure you’re able to connect it to your water source.

Refrigerator:

Outdoor refrigerators are a great item to have that will completely separate your outdoor and indoor kitchens. You can store the ingredients you want to use outside there, and you can reduce the number of times you have to run back inside.

You can go with mini or full-size options, it all depends on your needs and wants.

Floors:

Your best option for flooring is to go with a material that will be able to stand the elements of being outdoors. Concrete, brick natural stone, and tile are great options that can look good and last.

If you have any questions about how to create your outdoor kitchen, don’t hesitate to contact us here. 

How To Prepare Your Grill For Spring

grill

How To Prepare Your Grill For Spring

With spring on the horizon, so is the season’s first backyard cookout. If your grill has been braving winter’s storms on your back deck, it might be time to get it ready for this year’s BBQ season.

Follow these simple steps your neighbors will be jealous of the delicious smells coming from your backyard in no time.

Make sure you’re covered.

When your grill isn’t in use, you should ensure you have a cover that will protect it from the elements.

How’s the tank?

You must check your propane tank to ensure all connections are tight, and that you have enough in it to start grilling.

Check burners

Your grill burner should evenly distribute heat and flame. If it seems blocked it may be time to replace parts. Leftover food from last season? Nothing a little soapy water and a wire brush can’t fix.

Contact the Cincinnati Pool & Patio with any questions about our wide selection of custom gas grills to liven up your outdoor living space.

Safety Measures to Take For Summer Grillin’

grill

Safe Summer Grillin’

Summer is the season for grills and barbecues. The increase of grill usage comes with an increase in accidents related to grills too. When using your grill, make sure you’re taking the safety precautions necessary to keep your summer party safe and fun!

1. Fire Safety

When dealing with fire, it’s important to take every precaution necessary to ensure the safety of you and anyone who is near your grill.

The first important task is making sure you have a fire extinguisher close. In the case of any accidents, you need to take care of it quickly.

When dealing with fire, it’s important to know how to stop it from spreading.

2. Charcoal Safety

On average, charcoal grills cause more fires than gas grills. The biggest problem with these type of grills is lighting the charcoal.

Dealing with lighter fluid can be quite dangerous, and using too much or using it at the wrong time can cause mishaps or accident to happen.

3. Food Safety

Basic rules for food safety are: inspect everything you’re serving, keep it covered while it’s outside, keep it cool before you cook it, thoroughly heat it up, and always use your head.

Bacteria can grow at any temperature above freezing and will stay alive until it reaches 165 degrees.

4. Gas Safety

For a gas grill, you need to regularly check your gas lines, and make sure none of them are clogged up from debris, food, or bugs.

At the first sign of any trouble, you should turn off the valves, the fuel tank, and disconnect everything before you attempt to fix it.

5. Alcohol Safety

It’s important that when you’re operating a grill, you should be wary about how much alcohol you consume.

Just like when you operate a moving vehicle, you shouldn’t operate a grill under the influence of alcohol.

6. Smoke Safety

Even though there’s no way to stop smoke coming from your grill, it’s important not to breathe it directly or have it blow towards others at your barbecue.

Smoke from your grill contains carbon monoxide and other dangerous substances. It’s not healthy for your guests to be directly exposed to these chemicals.

If you have any questions about our supply of grills, please don’t hesitate to contact us.

3 Ways To Keep Your Grill in Top Shape

grill

Keep Your Grill in Top Shape

Like any good relationship, you need to put some work into the one you have to keep your grill in top shape. It doesn’t matter if you’re dealing with a top-of-line model or a cheap knock-off, with proper maintenance, any grill is bound to keep working a long time.

Cleaning the Grill Grate

After getting a fire going, the first order of business is cleaning the grill grate. The grill grate will see the most action and because of this—and the fact that food will come into direct contact with it—most of your cleaning attention should be focused here.

If you haven’t already, invest in a good grill brush with a long handle and firm bristles or scouring pad.

Oiling the Grate

After cleaning the grate, the question is: “To oil, or not to oil.”

Oiling your grill grate helps prevent food from sticking when cooking. To do this, dip a wadded paper towel in a little oil and, using tongs, wipe the oil evenly over the grate. Be careful not to use too much oil, because that’s a sure fire way to start a good flare-up—a little goes a long way here.

Cleaning your Grill

Cleaning the grill grate and the ash out is very important, the rest of the grill—not so much. About once a month take a rag and some cleaner to the outside of the grill. Actually, this will keep it looking nice and shiny. Like a good cast iron pan, grilling over and over seasons the inside of your grill.

Have more questions about how to keep your grill in great shape? Contact us here!